Articles
1. How To Install Your Theme
After you download the package from TesterWP account, please download it.
You can see here – https://testerwp.com/my-account
2 files bizz-ecommerce-pro.zip and guide.html are exist. Please unzip bizz-ecommerce-pro.zip first. If you have not any unzip software you can install Winrar software then extract bizz-ecommerce-pro.zip and save it on computer.
After extract file bizz-ecommerce-pro.zip you will receive bizz-ecommerce-pro.zip . This is your theme file.
You’ll see a file called bizz-ecommerce-pro.zip, which is the main file needed to upload and install.
Install Bizz Ecommerce Pro via WordPress
Step 1 – Log into your WordPress website and go to Appearance > Themes and click Add New.

2. Install Required Plugins
The theme included two licensing plugins: Revolution Slider, we purchased them from codecanyone.net and included them for free in the theme without any issues. However, if you want automatic updates and support from the plugin developer you need to purchase it separately (this is 100% optional). Some plugins include a field to enter your “purchase” code for the plugin. Because we are not allowed to include the license key for each of them, so you do NOT have a purchase code for that plugin and you can’t enter anything in this field. If there is any update, we are accountable for updating the theme with the newest version of plugins.
After installing the Bizz Ecommerce Pro theme, you’ll see a notification on the top of the page that says the theme needs some plugins to function properly.
The Bizz Ecommerce Pro theme requires following plugins:
- Meta Box: plugin for creating meta boxes for posts, pages,… It is free and available on WordPress.org
- Kirki Customizer Framework: it is a powerful theme options plugin that helps you change anything.
- Elementor Page Builder: it is Drag and Drop Frontend and Backend Pagebuilder Plugin for WordPress.
The Bizz Ecommerce Pro theme recommends following plugins:
- Contact Form 7: plugin for creating contact forms. It is free and available on WordPress.org
- MailChimp for WordPress: allowing visitors to subscribe to your newsletter should be easy.
- Woocommerce: it is a powerful, extendable eCommerce plugin that helps you sell anything.
- OT Portfolios: this plugin is used to manage portfolio.
- OT One Click Demo Content: this plugin is used to import demo content.
Install Plugins
Step 1 – Click to Begin installing plugins the top of the page.

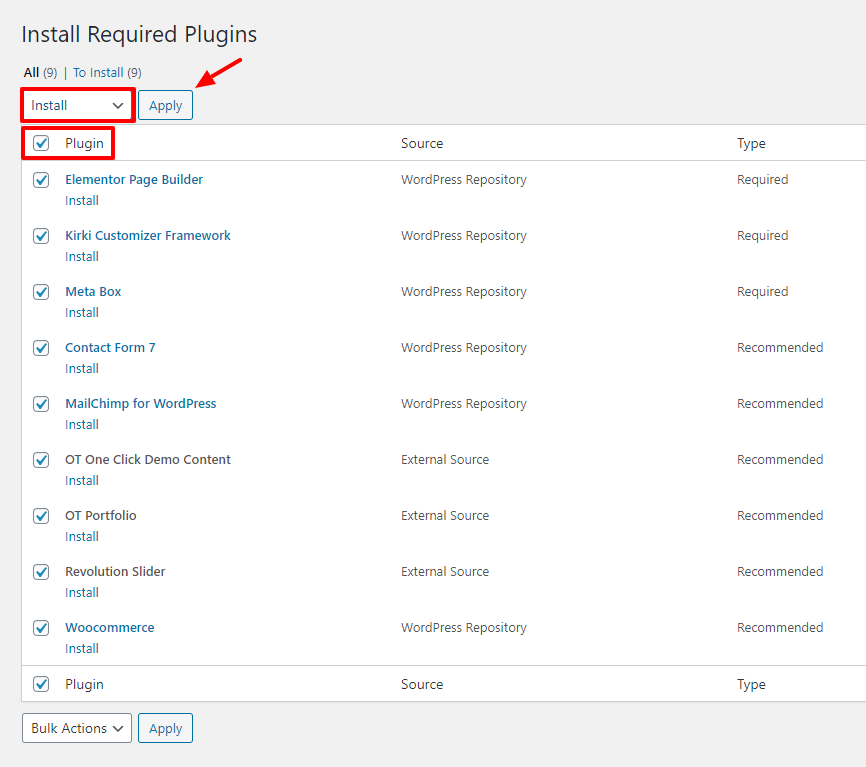
Step 2 – Check boxes to select all the plugins you want to install and click on Install from the dropdown box and then click the button to Apply.

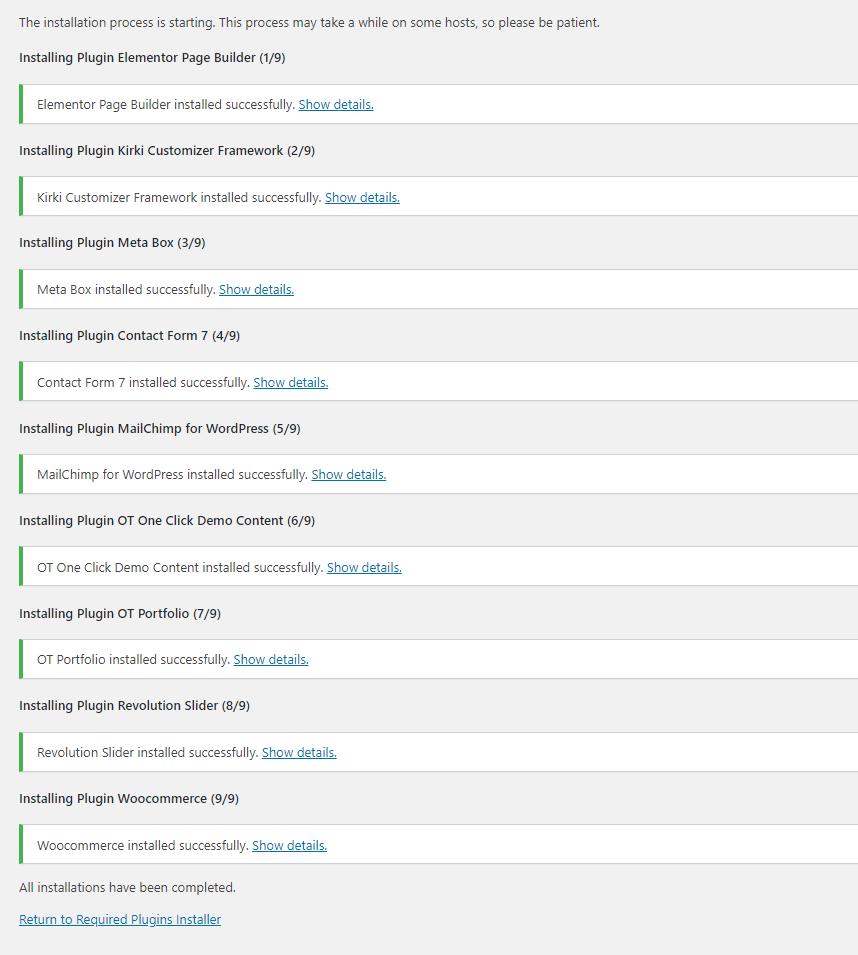
Step 3 – After you have installed all the plugins, return to the plugin installer.

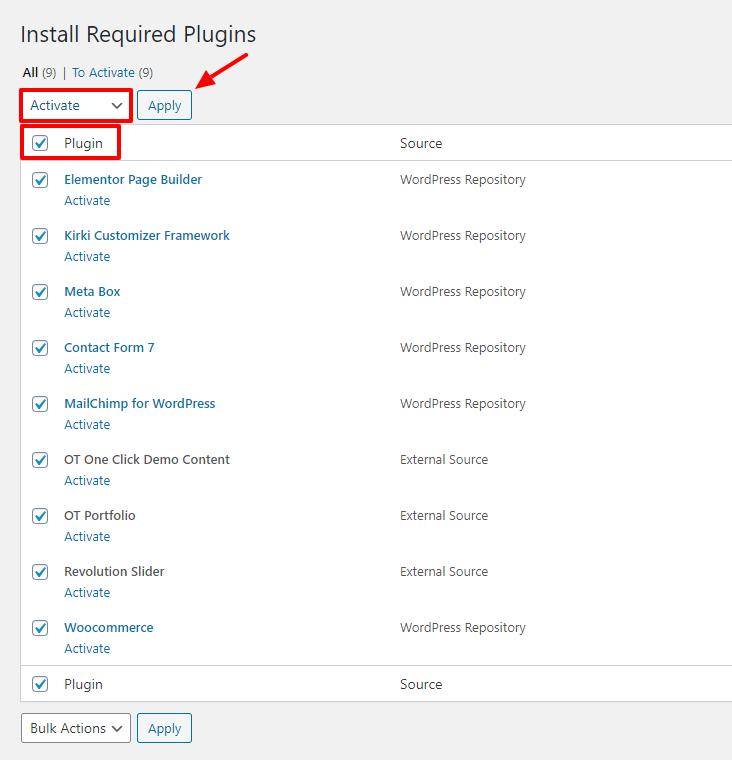
Step 4 – Select the plugins you installed, and apply the bulk action to activate.

Be patient and do not leave the page before the import ends. It takes some time till the importer upload all content and images.
3. Activate & Save Permalinks
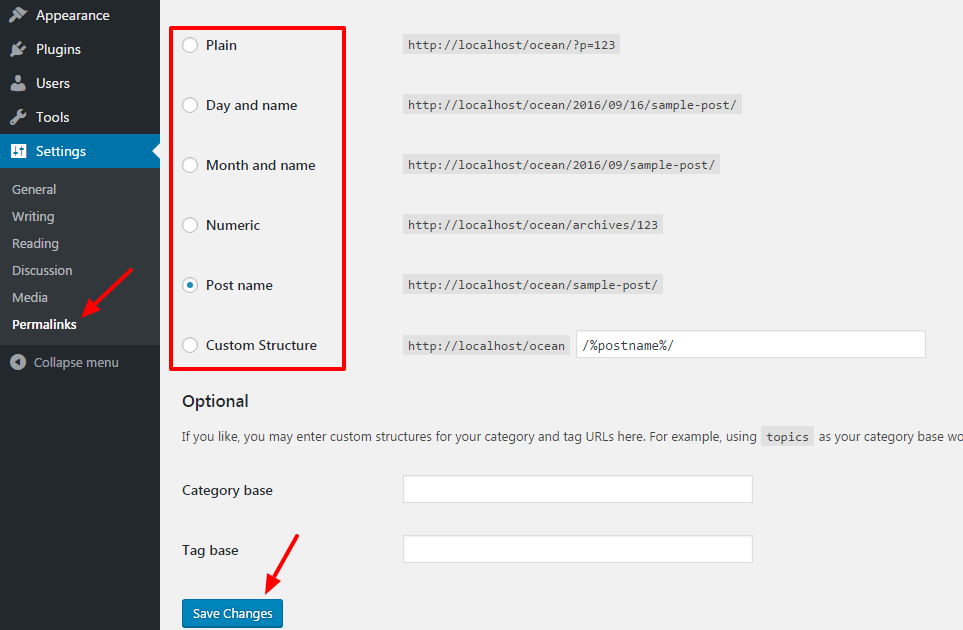
To prevent any 404 errors on custom post type pages, after installing and activating plugins for this theme, you need to activate & save permalinks.
Step 1 – Go to Settings> Permalink settings
Step 2 – Select the format you would like to use.
Step 3 – Click the save button.


 My Account