One click import demo content
The easiest way to import our demo content is to use our Demo Content Importer. Our importer will give you all pages and posts, widgets, Theme Options, and more with one click. To import our demo content, please see the steps below.
Note: first you make sure to install and activated OT One Click Demo Content plugin.
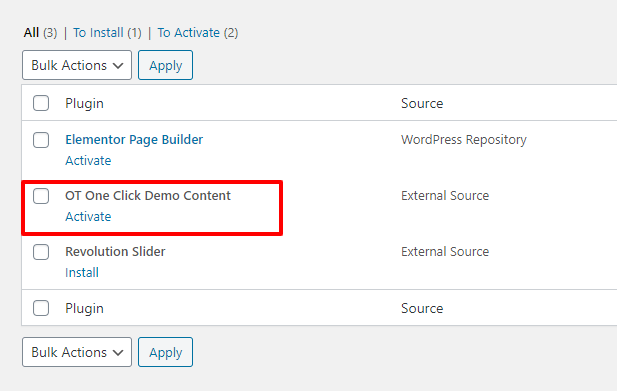
Step 1 – Go to Appearance > Theme Demo Data.
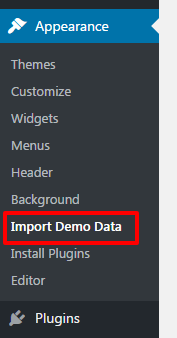
Step 2 – Choose the demo and data you want to import then click Import Demo Data

Step 3 – It can take a few minutes to import everything. Please be patient and wait for it to complete. Once it loads, you will see a success message below the tabs.

2. Manual Demo Import
If you cannot get the demo content to import, you can import the individual elements manually. Continue reading below to learn how to manually import demo content.
Where To Find Demo Files
Go to the download package > data_export folder you will see demo version folders, each of folder containing an XML file, slider files, customizer.dat, and widgets.wie file.

How to Import XML Files
Step 1 – Download and install the WordPress Importer plugin.
Step 2 – Go to Tools > Import.
Step 3 – Click Choose File and select a demo-content.xml file from the homepage folder.
Step 4 – Click the Upload File and Import button.
Step 5 – Check the Download and Import File Attachments checkbox.
Step 6 – After WordPress is finished importing, click the Have Fun link to return to your dashboard.

How to Import Customizer
Step 1 – Go to Plugins > Add New
Step 2 – Search and install plugin Customizer Export/Import
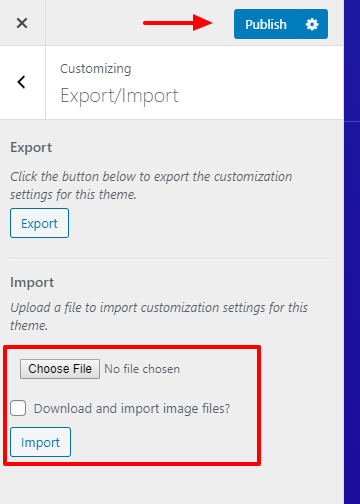
Step 3 – Go to Appearance > Customize > Export/Import.
Step 4 – Click Choose File and select data-export/customizer.dat file from the download package.
Step 5 – Click the Import button.
How to Import Widgets
Step 1 – Install and activate the Widgets Importer/Exporter plugin.
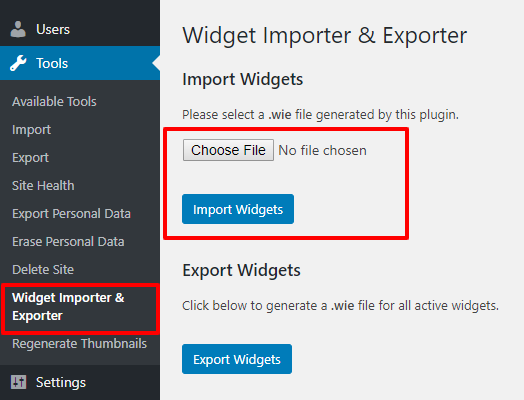
Step 2 – Go to Tools > Widget Importer & Exporter, click the Choose File button, and select widgets-data.wie file from the download package.
Step 3 – Click Import Widgets.
How to Import Revolution Sliders
Step 1 – Go to Revolution Sliders.
Step 2 – Click the Manual Import button.
Step 3 – Click Choose file and select a slider in data-export/revolution-slider folder from the download package.

Post-Import Steps
There are certain things a WordPress import cannot do for you during an import, so after uploading demo content. So after finishing the demo content, please see the steps below.
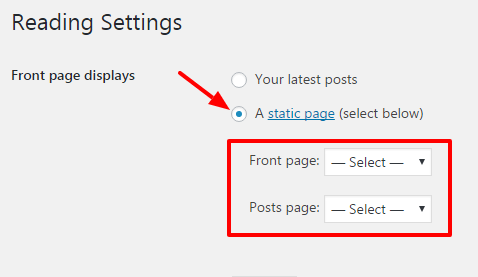
Home Page and Blog page
Step 1 – Go to Settings > Reading.
Step 2 – Under Front page displays, choose A static page.
Step 3 – Select a homepage for Frontpage and Blog page for the Posts page.
Primary Menu
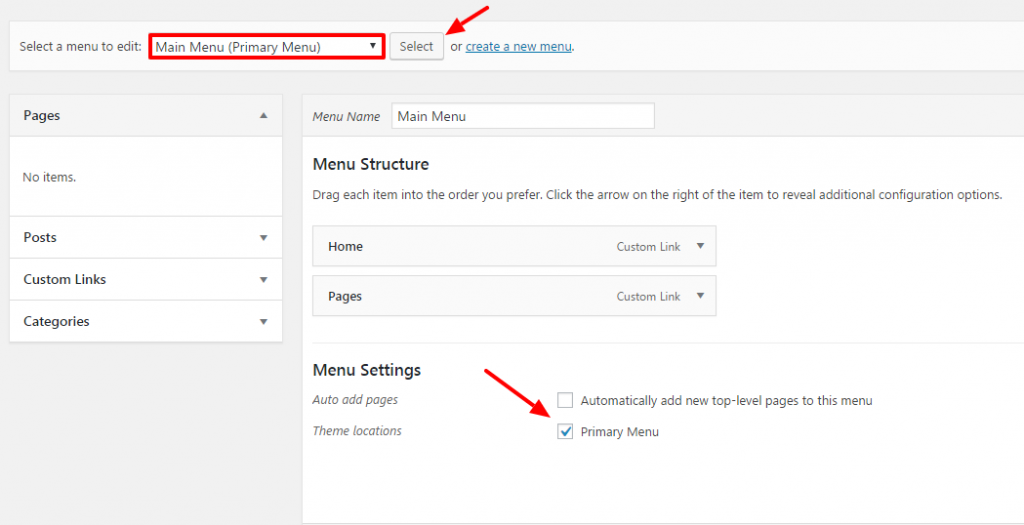
Step 1 – Go to Appearance > Menus.
Step 2 – Select Menu Main and click the Select button to edit it.
Step 3 – Scroll to the bottom of the page and check Primary Menu for Theme location.
Step 4 – Click Save Menu.
3. Troubleshooting the Demo Content Import
Revolution Slider Error: Slider with alias not found
This error message means that the slider you are referencing for (either in a shortcode or in a PHP function) does not exist. Read our How to Import Revolution Sliders article to learn how to import Revolution Sliders and you need to import the slider that has alias are not found.
Demo Content Import Fails
If the import stalls and fails to respond after a few minutes, or it fails with a simple error message like Import failed, You are suffering from PHP configuration limits that are set too low to complete the process. You should contact your hosting provider and ask them to increase those limits to a minimum as follows:
- max_execution_time: 180
- memory_limit: 128M
- post_max_size: 32M
- upload_max_filesize: 32M
500 Internal Server Error
There are many reasons why these errors occur in WordPress. One of the reasons it is PHP memory limits set too low. You should contact your hosting provider and ask them to increase those limits to a minimum as follows:
- max_execution_time: 180
- memory_limit: 128M
- post_max_size: 32M
- upload_max_filesize: 32M
Demo Content Duplicated
When you import our demo content, it can take several minutes depending on the speed of your server. Each time the button is clicked it will import the content, so if it is clicked twice it will import everything two times. There are two ways to get rid of duplicate content.
Method 1: WP Reset Plugin – This plugin is the fastest way to get rid of content. However, it will remove all content from your database and leave the default theme activated. It does not remove plugins, but will deactivate them and remove all pages, posts, menus, sliders, widget data, Fusion Theme Options, etc. Basically it removes all the content that you imported from our theme. Only do this if you are able to start over. Click Here To Download.
Method 2: Manual Removal – This method will take longer and simply involves manually removing duplicate items. For example, go to the Appearance > Menu and delete and duplicate items one by one. Same thing for pages, post, sliders, etc.

 My Account