My Account
 Installation Process
How To Install Your Theme
In order to download the theme, log into your TesterWP account, and go to your account profile. Then click on the download link- https://testerwp.com/my-account This is where you will find all of your TesterWP purchases. Find the Medical Elementor Pro theme, click on the download button, and select the Theme.
Before starting the installation you need a good hosting provider we recommend you best-hosting provider with a 2-month free subscription
After you download the package from TesterWP account, please download it.
You can see here – https://testerwp.com/my-account
2 files medical-elementor-pro-package.zip and guide.html are exist. Please unzip medical-elementor-pro-package.zip first. If you do have not any unzip software you can install Winrar software then extract medical-elementor-pro-package.zip and save it on your computer.
After extracting the file medical-elementor-pro-package.zip you will receive medical elementor pro.zip. This is your theme file.
You’ll see a file called medical elementor pro.zip, which is the main file needed to upload and install.
Recommended PHP Configuration
Many issues that you may run into such as; white screen, demo content fails when importing, empty page content and other similar issues are all related to low PHP configuration limits. The solution is to increase the PHP limits. You can do this on your own, or contact your web host and ask them to increase those limits to a minimum as follows:
- max_execution_time: 180
- memory_limit: 128M
- post_max_size: 32M
- upload_max_filesize: 32M
Install Logitech via WordPress
Step 1 – Log into your WordPress website and go to Appearance > Themes and click Add New.
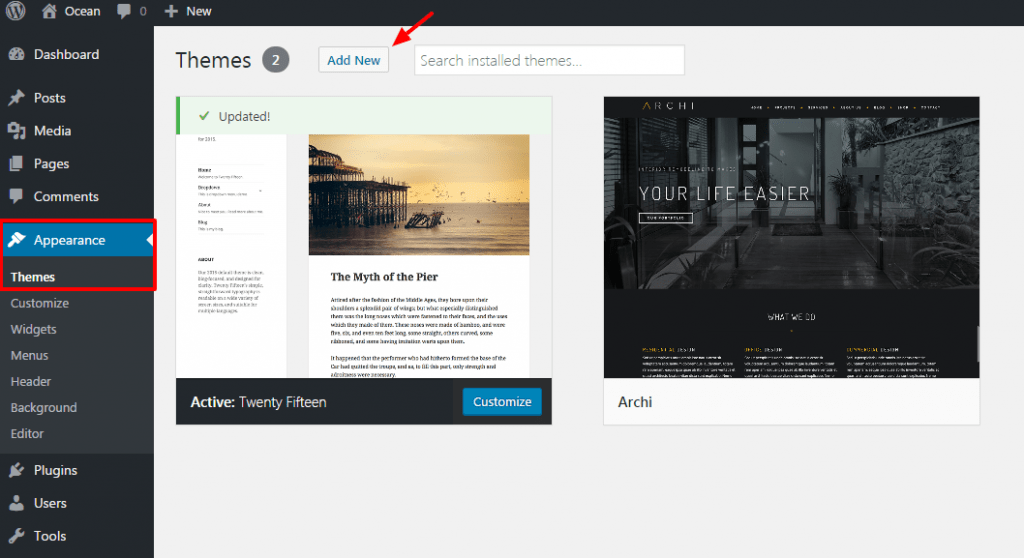
Step 2 – Click Upload Theme.

Step 3 – Browse the medical elementor pro.zip file on your computer and click Install Now.
Step 4 – Once WordPress has unpacked and installed the theme, just click to activate it.
Install Logitech via FTP
Step 1 – Unzip the medical elementor pro.zip file, you’ll get a folder medical elementor pro.
Step 2 – Log into your hosting space via an FTP software(Use an FTP client like FileZilla).
Step 3 – Upload that folder to wp-content/themes folder on your host.
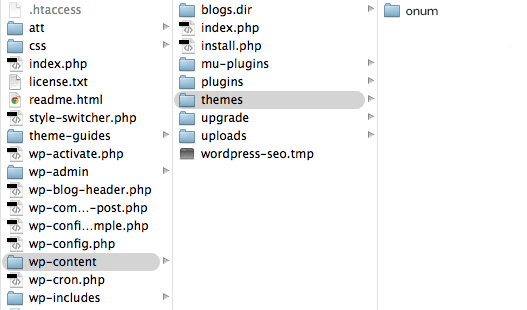
Step 4 – Go to Appearance > Themes and activate the medical elementor pro theme.
2. Install Required Plugins
The theme included two licensing plugins: Revolution Slider, we purchased them from codecanyone.net and included them for free in the theme without any issues. However, if you want automatic updates and support from the plugin developer you need to purchase it separately (this is 100% optional). Some plugins include a field to enter your “purchase” code for the plugin. Because we are not allowed to include the license key for each of them, so you do NOT have a purchase code for that plugin and you can’t enter anything in this field. If there is any update, we are accountable for updating the theme with the newest version of plugins.
After installing the Medical Elementor Pro theme, you’ll see a notification on the top of the page that says the theme needs some plugins to function properly.
The Techuup theme requires following plugins:
- Meta Box: plugin for creating meta boxes for posts, pages,… It is free and available on WordPress.org
- Kirki Customizer Framework: it is a powerful theme options plugin that helps you change anything.
- Elementor Page Builder: it is Drag and Drop Frontend and Backend Pagebuilder Plugin for WordPress.
The Medical Elementor Pro theme recommends following plugins:
- Woocommerce: it is a powerful, extendable eCommerce plugin that helps you sell anything.
- OT Portfolios: this plugin is used to manage portfolio.
- OT One Click Demo Content:
This plugin is used to import demo content.
Install Plugins
Step 1 – Click to Begin installing plugins the top of the page.

Step 2 – Check boxes to select all the plugins you want to install and click on Install from the dropdown box and then click the button to Apply.
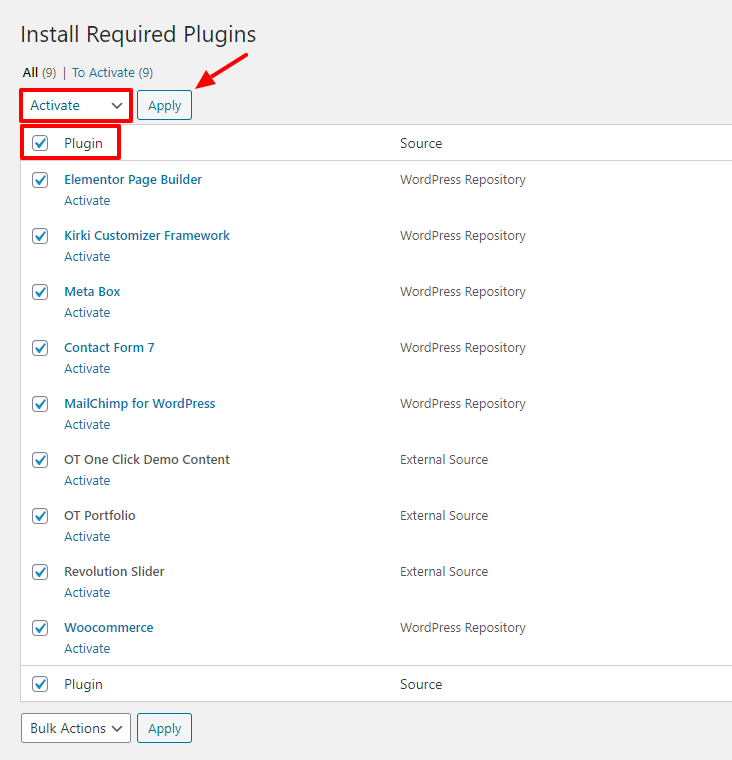
Step 3 – After you have installed all the plugins, return to the plugin installer.
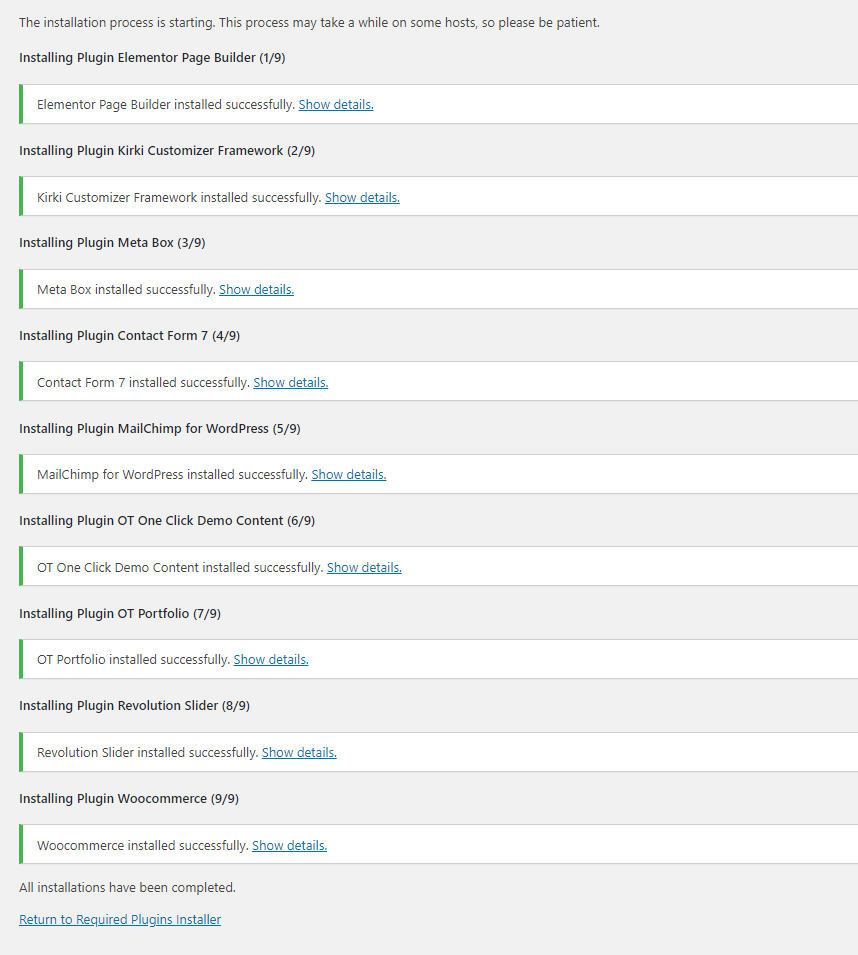
Step 4 – Select the plugins you installed, and apply the bulk action to activate.
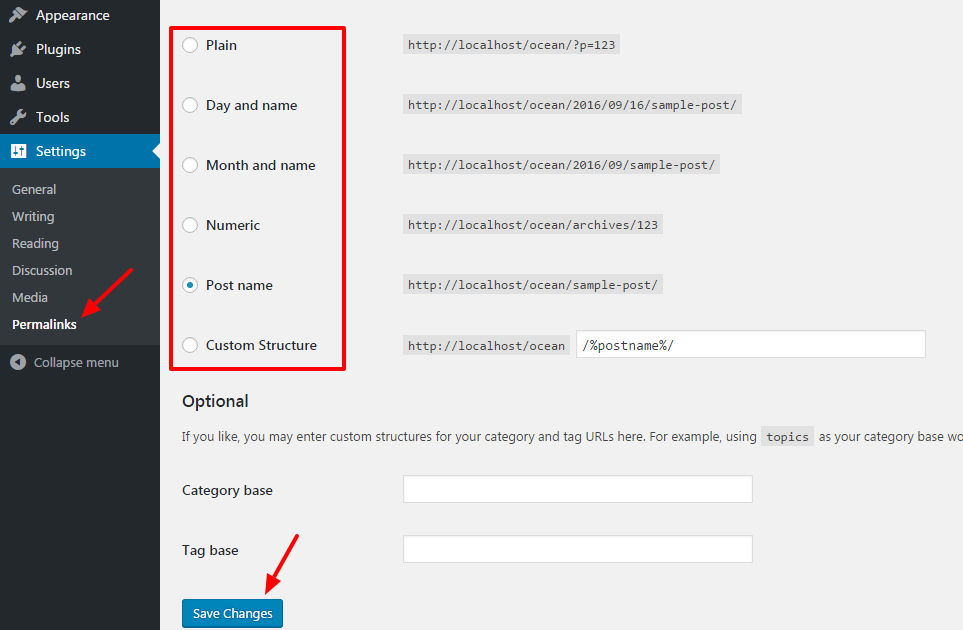
3. Activate & Save Permalinks
To prevent any 404 errors on custom post type pages, after installing and activating plugins for this theme, you need to activate & save permalinks.
Step 1 – Go to Settings> Permalink settings
Step 2 – Select the format you would like to use.
Step 3 – Click the save button.