My Account
 How to Hide Author Name In Blog Posts In WordPress
Relevant metadata, such as the author’s name and publishing date, are displayed in the majority of WordPress content. However, there are times when website owners need to know how to use WordPress to hide the author. Moreover, the method for hiding the author of a WordPress article varies depending on the theme or plugin. Pick the solution that best satisfies your needs.
Certain themes come with built-in features that allow you to “hide the author.” If not, though, you can download a different plugin specifically for that use. However, this might need fixing with themes or plugin compatibility.
What happens if someone removes the theme that has a built-in “hide the author” feature? Subsequently, that choice will become unavailable. Three methods for hiding or removing the author’s name from WordPress posts are described in this article.
Reasons to Hide the Author in WordPress
Some people might argue that since the author’s name lends credibility to the content, it is unnecessary to keep it hidden.
One of WordPress’s most important features is the metadata for the author. It facilitates readers’ learning more about the author.
However, there are good reasons to hide or remove the author’s name.
List of the reasons:
1. Several Employees Worked Together on a Blog Post
Giving the team credit as a whole would be unfair if this were the case. Putting all authors as contributors below the title requires a different approach.
2. Various Contributors and Freelance Writers Can Be Found on the Website
The idea behind having a blog website is to let readers know that “you” are the author. Employing freelancers or ghostwriters might become essential as the need for articles rises.
A writer might eventually cease to post on the blog. If the author’s name is hidden in posts and articles, readers will notice this less.
3. The Article is Controversial
If the subject matter of the piece is delicate or contentious, the authors might wish to remain anonymous. This helps them avoid compromising their employment or reputation.
In these circumstances, it helps to be able to “hide the author.”
Ways to Hide or Remove the Author’s Name from WordPress
1. How to Hide the Author’s Name in Google Chrome Using Custom CSS:
To use CSS, you don’t have to be a developer. The instructions that follow can help users hide the name of the author.
This is among the simplest approaches. In this solution, the author’s name will be hidden on the front end of the website rather than entirely removed via CSS.
The following instructions work best when performing this step in Google Chrome. Still, this method functions with other web browsers as well. Is your Chrome running slow? You can solve it easily by following the instructions.
- Navigate to the live post from which you wish to take the author’s name off.
- Right-click on that section and search for the author’s name that appears on that page.
- Open the tab for the element. To locate the author’s name and the “By:” label, simply hover over different HTML elements. Seek out the elements and texts that are highlighted.
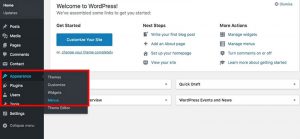
- Navigate to the Appearance & Customize menu item on the dashboard’s left side.

- Choose the tab marked “Additional CSS.”
- You can add the ‘display:none’ rule to the custom CSS code box to remove this element at any time.
2. Create a Generic Name of the Author
Creating a generic author name and using it for each of your posts is an additional strategy. Although the author’s name is not hidden using this method, it might be a good choice for smaller blogs in need of a short fix.
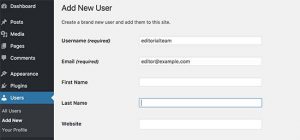
Your WordPress website needs to have a new author added to it. Give it a generic username, like “editorialteam.”
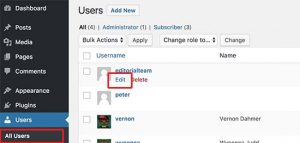
Proceed to Users » All Users after that.
Hover your cursor over the username you just created, and when the ‘Edit’ link shows up, click on it.
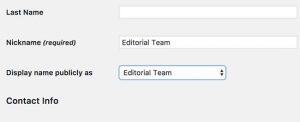
Enter the name you want to appear to visitors in the “Nickname” field on the user profile screen, such as Editorial Team.
Next, choose the nickname you just entered by clicking on the dropdown menu next to “Display name publicly as.”
For the user account, you can also add a generic bio and even make a gravatar.
Click “Update” to keep your changes made.
It is now necessary for you to include this new author in all of your previously published posts. The simplest way is to select the screen options menu at the top of the Posts » All Posts page.
To view all of your posts on a single screen, locate “Number of items per page” and enter a large number. For instance, “999” is used in the image below.
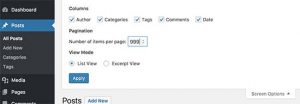
Once you’ve done that, click “Apply,” and WordPress will display all of your posts on one screen.
Open the dropdown menu that defaults to “Bulk Actions” to edit all of these posts at once, and then choose “Edit.”
Click “Apply”.
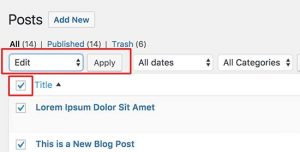
Now, for each of these posts, WordPress will display the bulk editing options.
You need to select the newly created generic account from the ‘Author’ dropdown menu.
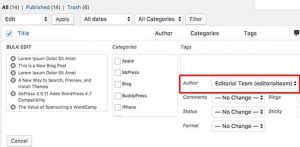
Click “Update” when you’re ready to apply this modification immediately.
The new author name will now appear in all posts created by WordPress.
This post was helpful in teaching you how to delete the author from WordPress posts. Check out our advice on how to monetize your blog or our selection of the top drag-and-drop WordPress page builders if you’d like more ideas.
Conclusion
Despite their advantages, author and date meta tags are only suitable for some websites. Or every post. So, it’s helpful to know how to hide or remove author and date information, regardless of whether you have evergreen content, a single-author website, or another reason for meta removal. Fortunately, there are plenty of options, and it’s straightforward.
Moreover, you have several options: use a plugin like WP Meta and Date Remover, add some basic CSS, manually remove the metadata from your theme files, or use the Divi Blog module to toggle it on and off.